Building your Reporting Pathways
Takes you through creating a complete whistleblowing reporting pathway from start to finish, showing all step types in context.
Starting the Report Builder
1. Navigate to Preferences > Reporting Pathways

2. Click the gear icon on the left menu

3. Click Reporting Pathways on the left menu and then 'Create new'.

4. Click "Create new pathway' from the dropdwon and then "Standard Report"

Settings
5. Firstly, go to "Settings" along the top menu and fill in the details which will form the initial display screen for reporters.
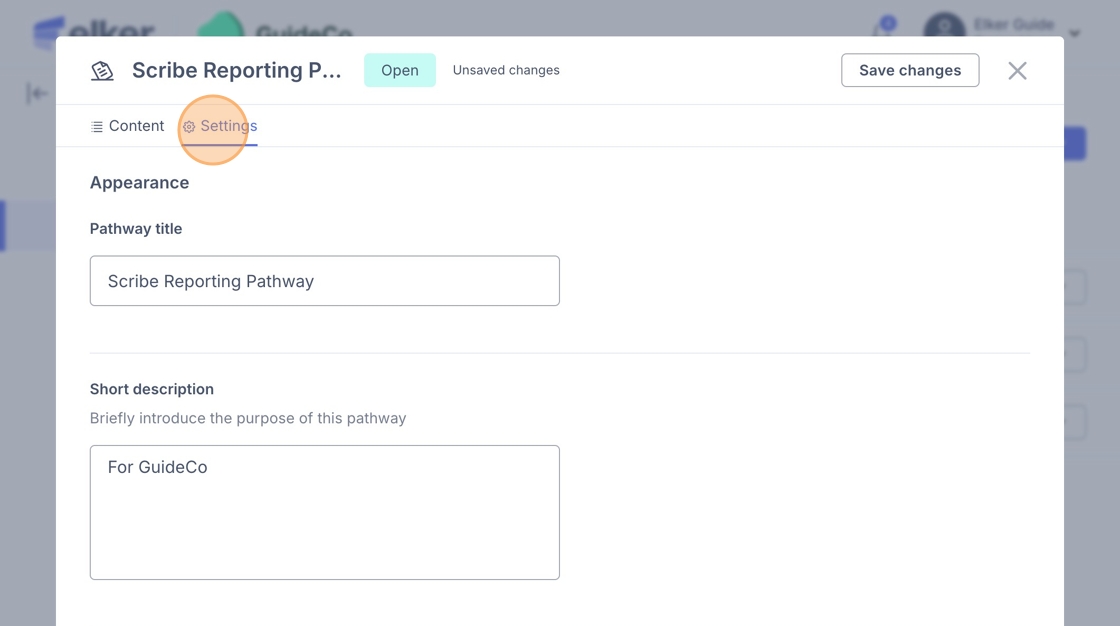
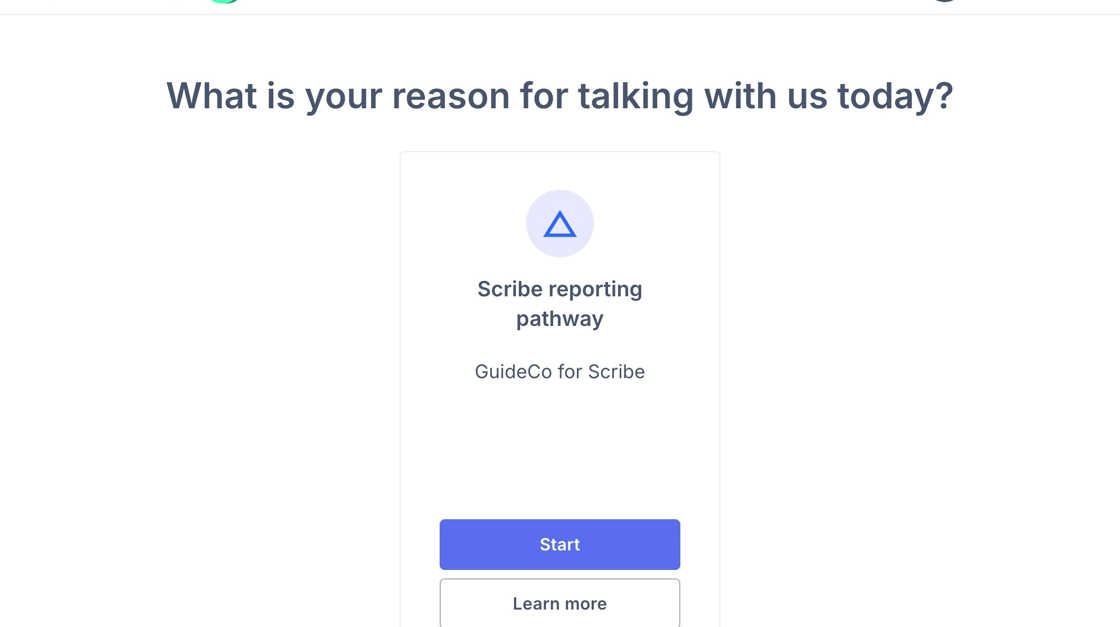
6. Pathway title & short description (first screen)
-
These are always shown up front when a user sees the pathway option
-
Think of them as the headline and tagline — they give the user a quick sense of what this pathway is about before they click anything.
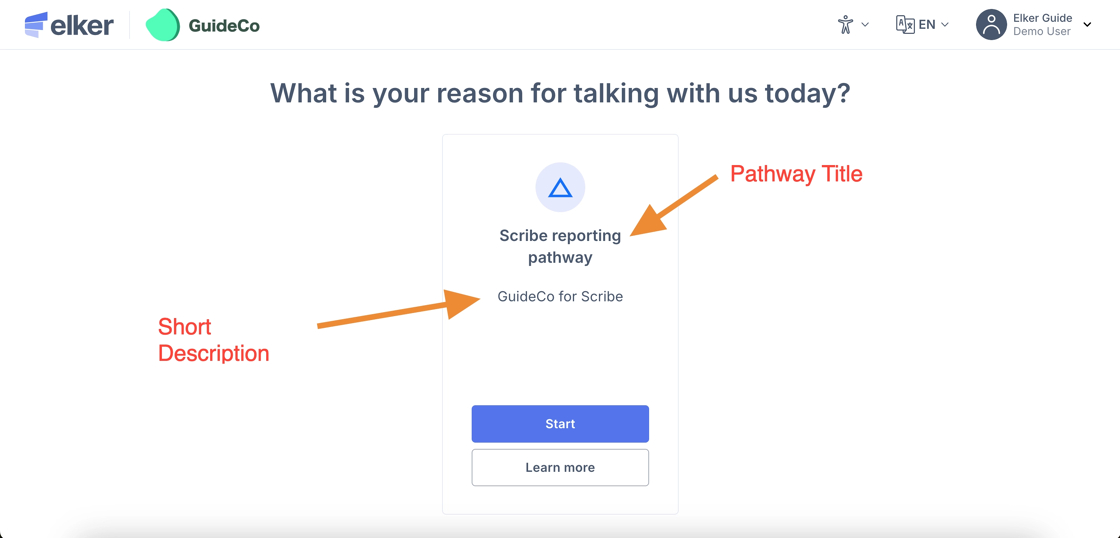
7. Explainer title & pathway information
-
If the user clicks Learn more, they’re taken to a detailed explainer page.
-
The explainer title is shown as a heading (e.g. About this reporting pathway).
-
The pathway information is where you can provide richer detail — context, guidance, or step-by-step notes.
-
This is optional for the user: they only see it if they choose to “learn more.”

8. Other Useful information in settings:
Pathway class: Broad category of the pathway (e.g. Report vs. another function).
Report type: Specific subtype within the class (e.g. Standard Report vs. another variant).
Pathway Kind
Initial: the first/default pathway used when a process begins.
Extended: secondary or advanced version, typically used for follow-on processes.
Feature Toggles
- Show Quick Exit: Option to display a button that lets a user leave the pathway immediately (often for safety/confidentiality).
Adding Steps to Your Pathway
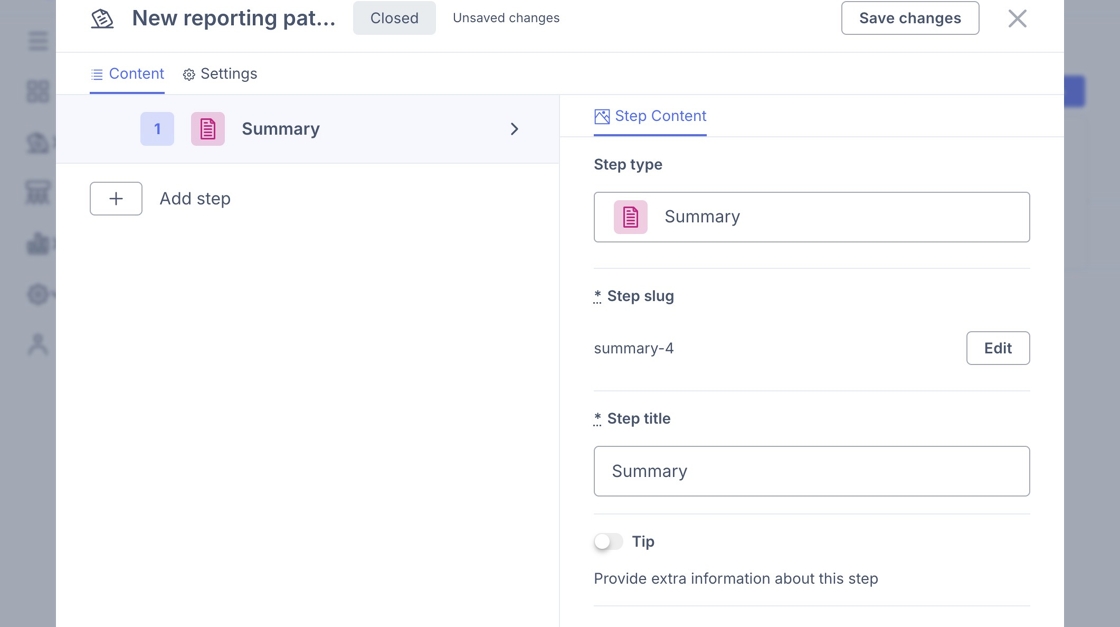
9. Here you will see 'Summary' as the default step included in any reporting pathway.
Summary will automatically be the last step in your reporting flow.
10. Click the "+" Icon next to 'Add Step' and then click "Add new".

Tip: Tip! A slug is a simplified, URL-friendly identifier for the step.
-
It’s usually generated automatically (e.g.
summary-4 in the above sreenshot). -
Purpose:
-
Makes the step easier to reference internally (e.g. in links, logic jumps, or when exporting data).
-
It’s unique to that step within the pathway.
-
-
Users don’t normally see the slug — it’s more for system/technical use than for end-users.
In short: The step slug is the behind-the-scenes “ID tag” for the step, while the step title is the user-facing label.
Saving Progress
11. Ensure you are saving changes as you go. Do not refresh the page without saving changes first.

Including Tips
12. You can add Tips at various points in each Step. Tips should be used to provide context, best practices, and reminders that help users complete steps accurately and efficiently.
Toggle the highlighted button to create a tip and then fill in the information to set up a tip in any given Tip.

Logic Jumps
Tip: Tip! Use logic jumps to make pathways shorter and more relevant. Only ask for extra details when the reporter’s answers make them necessary.
13. Let’s say we want to add a Logic Jump for one of the questions in a Composite step. To do this, select the step that will act as the trigger for the jump.
You can add logic at any time, but in practice it works best once most of your questions are set up. If you’re building a pathway step by step using this guide, you may want to return to this section later once you’ve added the relevant questions.

14. Click 'Logic Jump' on the upper right menu and then 'Add rule'.

15. Select the question to base your logic on
Use the dropdown to choose the question in your pathway whose answer will determine whether to skip ahead or branch to a different step.

16. Choose the condition type
Click the condition field and select how the answer should be matched (e.g., “is”, “is not”, “contains”).

17. Select the matching answer option
From the list, choose the specific answer choice that should trigger the jump.

18. Select the destination step
In the “Then jump to step” dropdown, pick the step you want the user to be taken to when the condition is met.

19. This logic rule will now move the reporter directly to the selected step if their answer meets the set condition.
Privacy
20. Click the '+' Icon next to 'Add Step' and choose 'Privacy.
The privacy step allows reporters choose between anonymous or identified reporting, including how to set anonymity as mandatory or optional.

21. Click this text field. You can change to what you want the title to be for this page.
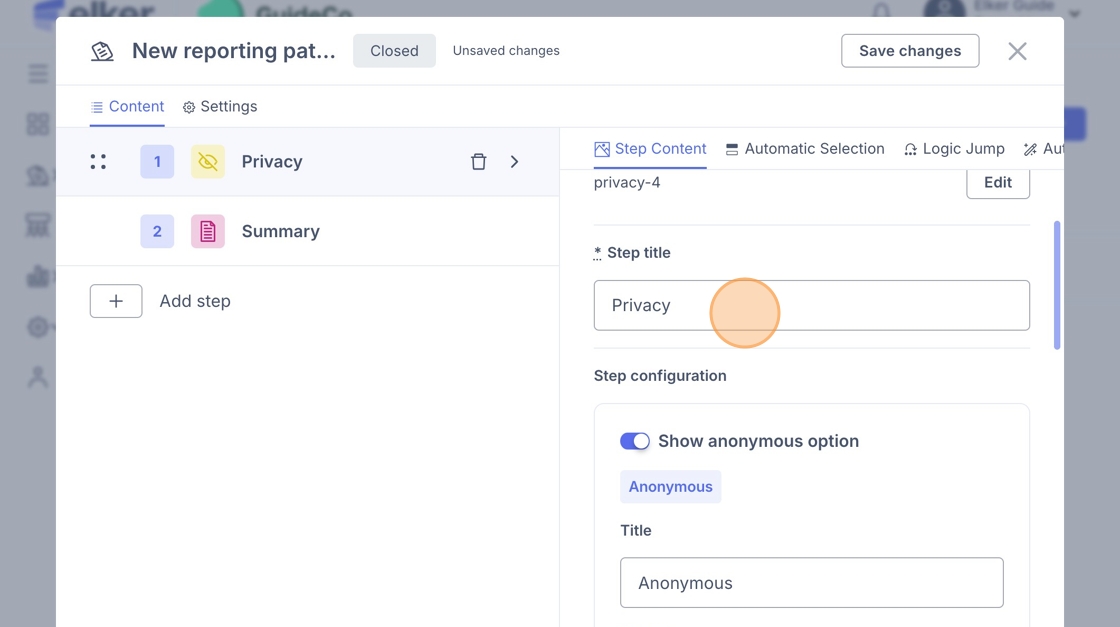
22. You can then choose to toggle on/off the anonymous/identified options.

23. You can add a new field by clicking '+ Add field' for those fields that will appear if a reporter chooses to identify themselves.

24. If you navigate to 'Automatic Selection' on the top menu, you can set a default option for this step.

Information
25. Click the "+' Icon next to 'Add Step' and select "Information"

Tip: Tip! Use this step to set expectations — clarity here reduces incomplete or irrelevant reports.
26. You can change the title of the page e.g. "Before you Begin"
You can then add additional text to brief reporters before they begin.

Composite
27. Click the "+' Icon next to 'Add Step' and select "Composite."
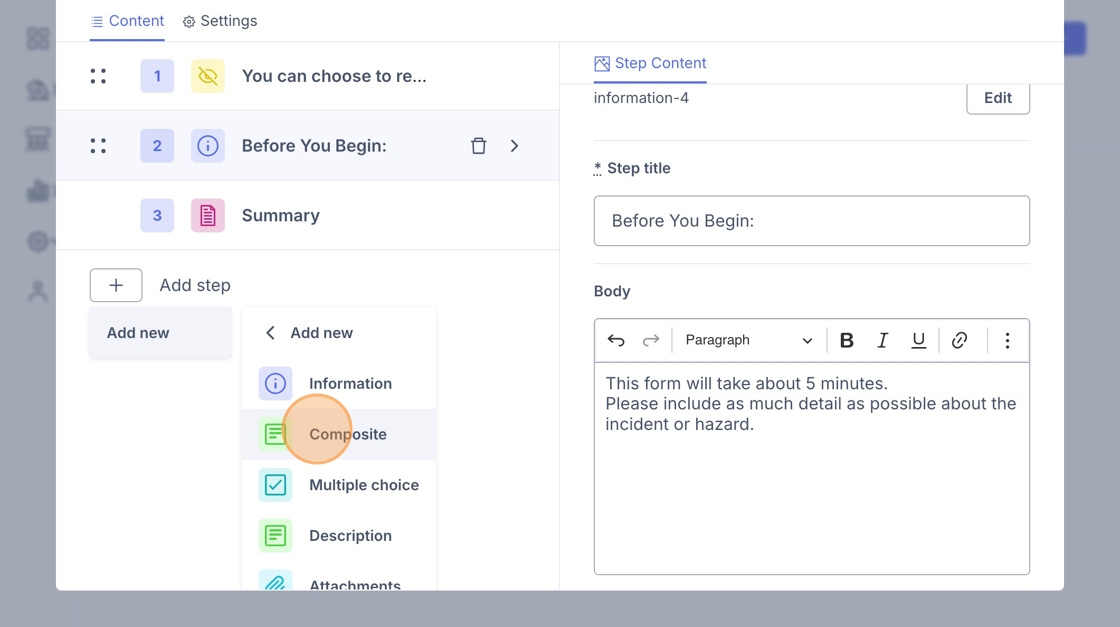
28. Here you can choose from different question types.
-
Single line – for short responses, e.g., Incident location.
-
Multi-line – for detailed answers, e.g., Describe the incident.
-
Date – to capture a specific date, e.g., When did the incident take place?
-
List – to let the user select from a set of options.

Multiple Choice
29. Click the "+' Icon next to 'Add Step' and select "Multiple choice"

30. Click into 'Step title' to change the name e.g. 'Immediate Actions Taken'

31. You have various options here to toggle:
Multiple Selection: If turned on, users can select more than one option in the multiple choice question.
Dropdown: You can make the multiple choice a dropdown list if there are too many options.
Open-ended: You can provide the user with an open-ended option at the end if none of the options work for them.
Mandatory: You can make this question mandatory.

Levels
32. Click the "+' Icon next to 'Add Step' and select "Levels".

33. Here you can select the levels you want to be included in this Reporting flow.

Inboxes
Tip: Tip! An inbox needs to be first created to be able to display it. If you don’t have any inboxes, go to “inboxes” to create one first.
34. Click the "+' Icon next to 'Add Step' and select "Inboxes"

35. Under ‘Add Inbox’, select the contacts you want reporters to be able to choose from when deciding where their report should be sent.
Click the name to add them e.g. "Jack Murray" in this case. You can select as many as you want available to reporters.

36. You can also set a default recipient of reports i.e. If the Reporter does not have a preference, the report will default to this person. Click "Automatic Selection"

37. Click the Dropdown under 'By default set to:'
Click the name of the person you would like reports to go to by default.

Grouping
Tip: Tip! Grouping allows you to display all the steps within the group in a single screen so that the reporter does not have to navigate across multiple screens.
38. Click the "+' Icon next to 'Add Step' and select "Group"

39. Click this '+' sign to choose a 'Step' to fall into this Group.

40. A common Grouping may be 'Description' and Attachments' - If you want a reporter to provide more information about a report and be able to attach any relevant files.
To create this Group - Click "Description"

41. Click this text field. Here you can change the "Step Title' e.g. to 'Tell us about the incident'

42. To add another 'Step' to the Group, Click the '+' sign again next to 'Group'.

43. Click "Attachments" this will then add attachments to the same page as your previously selected Step under Group.

Tip: Tip! Group related steps to save clicks. For example: Description + Attachments, Multiple Choice + Date, or Information + Composite.
Think about grouping when the questions are closely related or when combining them will make the pathway flow more naturally for the reporter.
Publishing your Reporting Pathway
Tip: Tip! Make sure you have saved changes first.
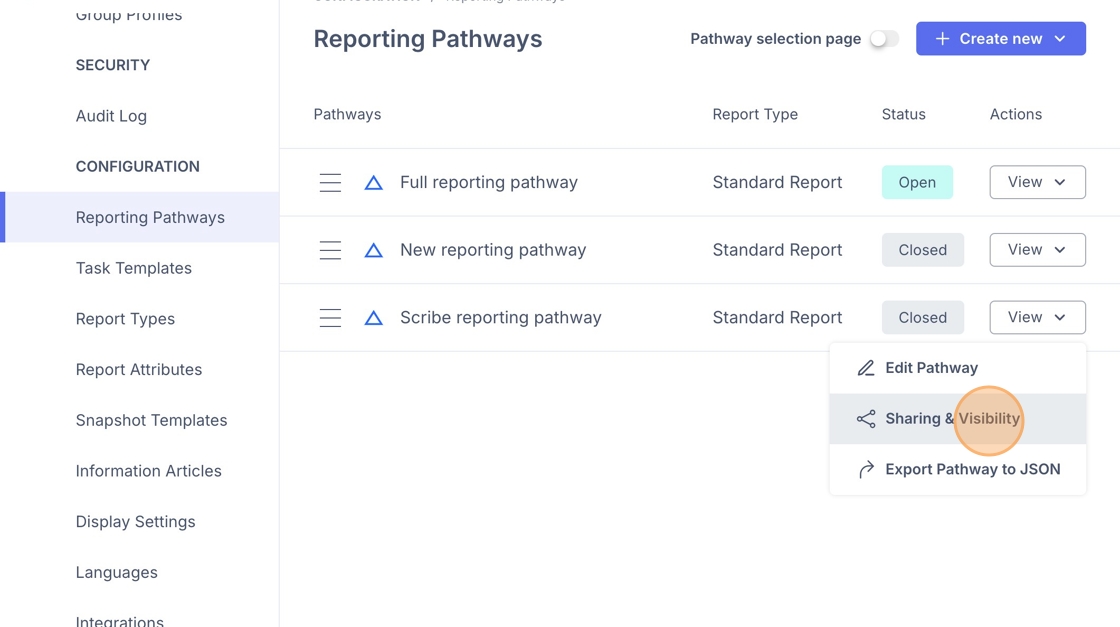
44. Under the Reporting Pathway you have been working on click "View" on the right hand side, then click "Sharing & Visibility".
45. Click "Open" - this will generate a link so you can view the reporting pathway from the reporters perspective.

46. Click "Copy Link"
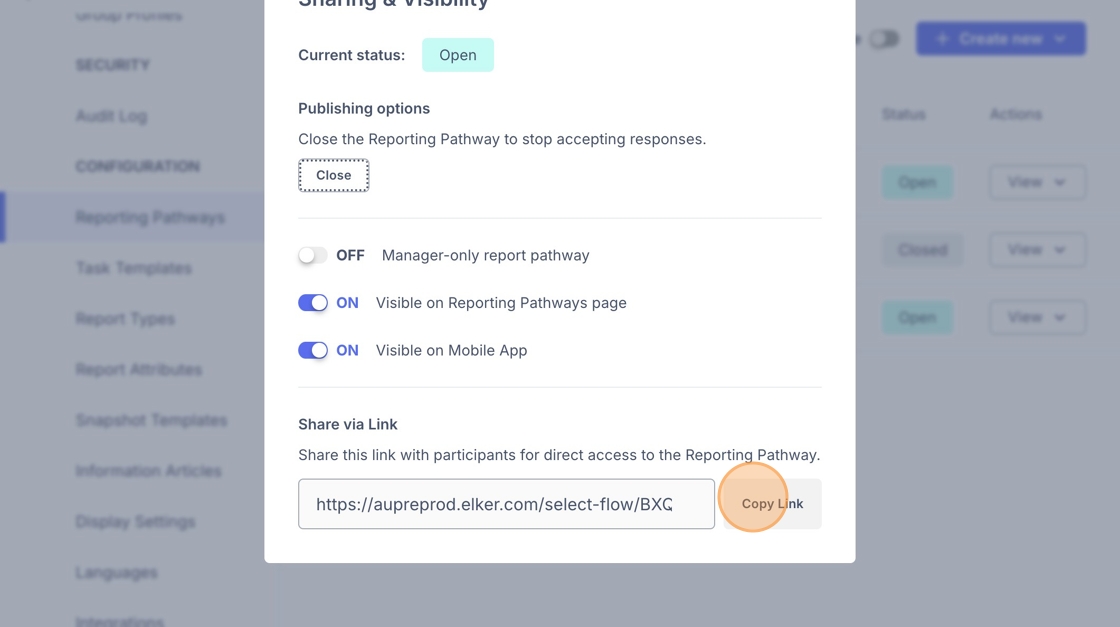
47. You can then view the reporting pathway in a new window.